
Raised garden beds are popular for a good reason. They look absolutely fantastic in the garden and provide perfect conditions for whatever plant you are planning on growing. Raised garden beds extend the growing season, so new seeds and replanted plants thrive easier. Raised garden beds usually sit on the earthen ground, with a hollowed-out bottom and a constructed frame.
Why composite decking panel is best for raised garden beds
While traditionally built with wood, creating a raised garden bed with composite decking panels will actually last a lot longer and looks absolutely incredible.
Quality composite decking, such as our range at Easy Panel, is made with eco-friendly recycled timber powder and high-density polyethylene with enhanced mould resistance and UV stabilisation and no oiling or coating required.
Long-lasting and durable
While wood eventually breaks down, high-quality composite decking like ours at Easy Panel will last for decades. In fact, our composite decking panels come with a 10-year warranty and last much longer. Composite decking looks and feels like timber of the highest quality – but with much easier long-term preservation. While our decking looks and feels just like high-quality timber, it is much more durable and is 100% weatherproof for Australian conditions.
Stunning outdoor design
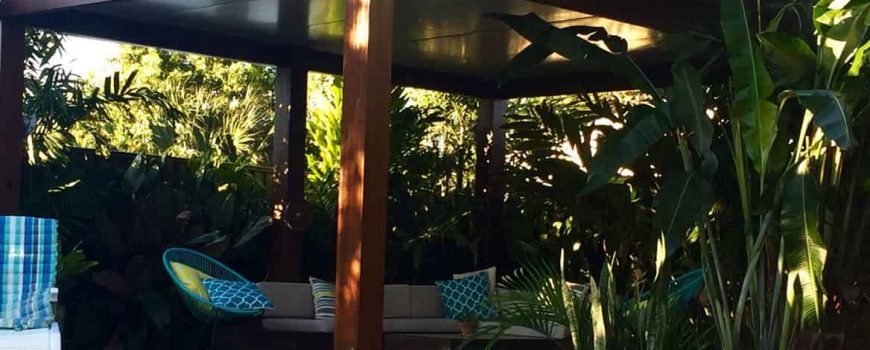
Raised garden beds made of composite decking look fantastic. Especially if you already have composite decking around your pool, deck or outdoor living areas. A raised garden bed with the same highly aesthetic material ties everything together. It increases the appeal and value of your outdoor spaces. A raised garden bed made with composite decking that is placed near a matching or complementary pool deck or patio is a streamlined, high-quality look that’s sure to impress the neighbours.
Easy to make
Making a raised garden bed with composite decking is fast and easy, with no splinters and no fuss. Our composite decking has a hidden fixing system that’s carefully designed to hide fixings. This fixing system makes it easier to build up your height and extra security to your garden bed frame.
Steps to make a raised garden bed with composite decking
A note before: short cuts and alternate options
If you’d like to try some alternate options for any of the steps below, try these. For the simplest and quickest option, choose the ‘fastest’ alternative below.
Fastest: Complete both the below short cuts; skip the angle iron steps, and skip using the spike system.
Short cut: Skip the angle iron steps. Instead, carefully nail or drill the panel pieces together on the ends that they meet, rather than using an angle iron aluminium. Be sure not to use nails or screws that are too wide, or you may come into issues. Also, be sure to check that you have got the right length, layout, and angles before nailing or drilling. Depending on the height, you may also want to add inner vertical support beams in the middle to secure your panels vertically.
Short cut: You can skip using the spike system and just place your raised garden bed onto the ground and ensure it is level. You could optionally dig a slight trench to hold the base of the garden bed in place.
More Secure: Place support beams or support spikes for added support, either temporarily or permanently.
Advanced alternative:
If you’d like to place your raised garden bed on concrete or decking, you can create your own advanced design to cater for this. Be sure to keep in mind the need for water drainage and the potential mess this may cause. You may opt to add wheels or a separate drainage catchment system. Be sure to factor in the sheer weight of wet soil and the base stability and support requirements.
Now that you know the shortcuts and options, here is our guide on making your raised garden bed.
The process: how to make a composite decking raised garden bed
Step 1: Determine the location for your garden bed
The first step in making your raised garden bed is determining where you would like it to go. Traditionally, raised garden beds are open at the bottom and sit on the grass, dirt, or soil. This is the best option for a straightforward raised garden bed design.
Step 2: Decide how many raised garden beds you want
You’ll also want to plan how many garden beds you would like. You might find you would like several raised garden beds placed around your yard in different locations. If you have composite decking in other areas, you should consider where the best placement will be to tie that consistent, high-quality look together, right across your space.
Step 3: Decide on the shape and height
Once you’ve picked where you would like your garden bed to go, it’s easy to determine what shape and height will look best. Be sure to keep in mind what you will plant in your garden.
A square garden bed is one of the easiest options, as the decking pieces you need will all be the same length. A rectangular garden bed is also simple.
If you would like a different shape, such as an L shape, squared U shape, or an E shape, you can easily do this with a combination of square or rectangular garden beds placed side by side. Using multiple smaller square or rectangular shapes may be better for longer designs; be sure to keep in mind the volume of soil and the weight of that soil against your frame. Having multiple garden beds side by side is also a good way to separate your different plant varieties visually and practically.
During this step, you should also decide whether you will keep your decking pieces whole or cut them. This depends on your desired shape (for example, a rectangular shape would require two shorter pieces) and the size of your garden bed. Be sure to measure and properly plan!
Step 4: Determine and gather the materials needed
Now that you know the other details, you can figure out how many composite decking panels you need for your design.
You can also decide whether you would like a streamlined look, matching your garden bed panels to your other decking, or a complimentary or contrasting look, with another composite decking colour.
Our high-quality and eco-friendly composite decking panels come in three colour options that look fantastic with just about any colour scheme; mocha, light grey and charcoal. If you already have composite decking leftover from your pool decking or patio projects, using that will save you money and keep a consistent look.
If you’re opting to use angle iron aluminium on the outside of the corners (instead of nailing or screwing the panels together on the ends), you’ll also need to get these. You’ll need one for each corner piece of your garden bed (four if you are making a square or rectangular-shaped garden bed). These will need to be all the same height as each other and tall enough so that they can cover the entire height of your garden bed’s panels, with extra room on the bottom to cut at an angle to form ground spikes for the base of your garden bed.
Step 5: Cut the ‘spike’ ends into your angle iron aluminium
You can usually get your angle iron aluminium cut when you purchase it. Be sure to make sure you have your measurements for the height correct when you do (with room for the ground spike part included).
If you have the machinery to cut it yourself (and the safety know-how), be sure to measure for the correct height and consistency with all four pieces, and then make the cuts.
You’ll want these cut using small diagonal angles from the bottom mark (where your garden bed composite panels will end) to the end of your aluminium pieces to form a squared-off triangular shape that can penetrate the ground and give your garden bed support without being too sharp or dangerous. Still maintaining a somewhat blunt end is a good idea, as loosening the dirt when you install the garden bed and firming it up after placement may be a safer option than sharp ends.
Step 6: Lay your plan out visually on the ground
To make sure you have the correct lengths of decking to piece them all together, it’s a good idea to lay everything out on the ground, ready to assemble. You’ll be able to see what you need to do to ensure you drill into the right places. It sounds simple, but as your panels will overlap slightly, it’s easy to get wrong without planning everything out properly visually. With the overlap, the screws will need to be assembled further to one side of each of the angle iron pieces (if all of your composite decking pieces are the same length). You’ll see this all when you lay the pieces out, which is what makes this step so important.
To really ensure it’s all correct, you can even use temporary wooden spikes to support your decking pieces and hold them upright while assembling. This lets you lay out your panel pieces and your aluminium angle iron to ensure all is correct.
Step 7: Attach your decking side panel pieces together vertically into 4 ‘walls’ using the fixing system
Our easy fixing system ensures that you can easily fit your pieces of decking together lengthwise to build up your height and add extra stability and support to your raised garden bed. Complete this step before you drill the ends into your angle iron aluminium.
Step 8: Mark, then fix your garden bed ‘walls’ to your angle iron pieces
At this step, you should mark on your angle iron where the screws are best to go, in order to drill your decking into your angle iron hinges, and you know it’s correct with the walls assembled vertically. This is important, as your panel pieces will overlap, so it is crucial to fix each to the correct place and make sure all four sides fit together as they should.
Tips to ensure you get the fixings right:
- Keep the angle iron drill positions consistent
- Rotate these in the same direction each time you move to a new corner
- Ensure you pay attention and screw the decking pieces into the correct spot on the angle iron hinges so all four walls match up perfectly.
- Getting help to hold your ‘walls’ in place while you check and mark the correct spot, while these walls are in place, removes a lot of room for error.
- Using temporary wooden spikes to hold the pieces up is a buddy-free way of doing this.
- Make sure the angles are correct to fit all sides together, before marking or drilling.
- On this guide, the aluminium pieces go on the outside of the panels. If you would like these on the inside, be sure you check everything measures up and lines up correctly first in step 6.
Once you’re sure you have marked everything in the correct places, you can use a power drill to drill screws from your decking pieces into your marked drill spots on your angle iron hinge pieces.
Be sure to attach the ends of each of your panel pieces for maximum hold strength, (even with the Easy Panel fixing system for added strength), as soil can be very heavy. Make sure you rotate the iron pieces in the same direction with each corner you get to, so your sides are the correct length for joining everything together when complete.
Step 8: Place your garden bed
Now your composite decking raised garden bed frame is complete, it’s time to place it where you want it.
Level the ground as best you can, then place your raised garden bed down, with the spikes facing down into the earth. If the ground is really hard, you may want to soften it first or break it up, then re-pack it around the edges once complete (your plants will most likely prefer softened ground at the base of your garden bed, too, so don’t be afraid to soften the entire area). Press the garden bed corners down until the spikes have been driven down into the ground and the garden bed sits flat against the ground. If any of your garden bed frame is not sitting level, you may have to dig slightly into the dirt to level it.
Step 9: Fill your raised garden bed and plant away!
Most recommend filling your garden bed with a layer of thoroughly wet newspaper or cardboard along the bottom. You can also use a layer of hardware cloth, or another fine metal mesh, along the bottom of your garden bed and up the inside sides. Some people place plastic core flutes against the inner sides to ensure that the soil is contained inside the bed. This is not recommended for the bottom, however.
Next, fill the bed with soil, almost to the top. A good soil combo is about 50-60% of good quality topsoil and 40-50% of well-aged compost. Dark and rich soil with plenty of nutrients is great.
Now your raised garden bed with composite decking panels is complete! You can happily plant away and admire your excellent work!
Your Composite Decking Experts
At Easy Panel, we service South East Queensland with the highest quality, easy to install composite decking, roofing, fencing and screening, designed for long-lasting durability and easy installation. Our products come with a 10-year warranty and are a highly aesthetic way to complete your project. Chat with our friendly team today to learn more about our range of products.
